RichText Component Reference
RichText component could be used for displaying a string with multiple styles. You could customize the text style of each text segment with a few simple BBCode.
The currently supported tags are: color, size, outline, b, i, u, br, img and on, these tags could also be nested within each other.
For more information about BBCode, please refer to the BBCode format section below.

Click the Add Component button at the bottom of the Inspector panel and select RichText from UI -> Render to add the RichText component to the node.
To use RichText, please refer to the RichText API documentation and the RichText scene of the test-cases-3d project.
RichText Properties
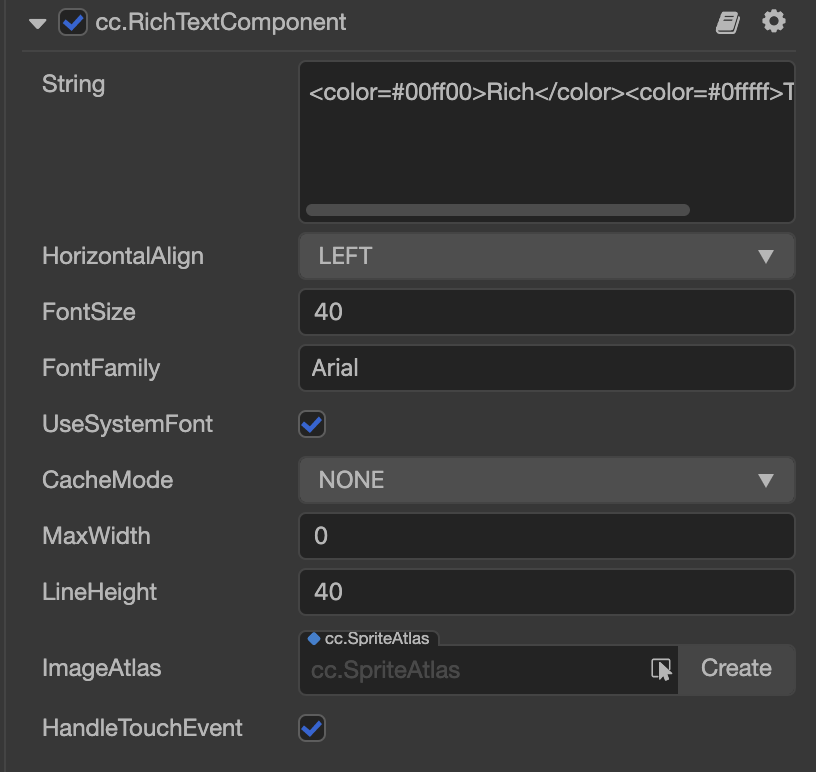
| Property | Function Explanation |
|---|---|
| Font | Custom TTF font of RichText, all the label segments will use the same custom TTF font. |
| FontSize | Font size, in points (Note: this field does not affect the font size set in BBCode.) |
| HandleTouchEvent | Once checked, the RichText will block all input events (mouse and touch) within the bounding box of the node, preventing the input from penetrating into the underlying node. |
| Horizontal Align | Horizontal alignment |
| Vertical Align | Vertical alignment |
| ImageAtlas | The image atlas for the img tag. For each src value in the img tag, there should be a valid spriteFrame in the imageAtlas. |
| Font Family | Custom system font of RichText. |
| Use System Font | Whether to use the system default font. |
| MaxWidth | The maximize width of RichText, set to 0 means the maximize width is not limited. |
| LineHeight | Line height, in points. |
| String | Text of the RichText, you could use BBcode in the string. |
BBCode format
Basics
Currently the supported tag list is: size, color, b, i, u, img and on. There are used for customizing the font size, font color, bold, italic, underline, image and click event. Every tag should has a start tag and an end tag. The name and attribute format of the start tag must meet the requirements and be all lowercase.
It will check the start tag name, but the end tag name restrict is loose, it only requires a </> tag, the end tags name doesn't matter.
Here is an example of the size and color tag:
<color=green>Hello</color>, <size=50>Creator</size>
Supported tags
Note: all tag names should be lowercase and the attribute assignment should use
=sign.
| Name | Description | Example | Note |
|---|---|---|---|
| color | Specify the font rendering color, the color value could be a built-in value or a hex value. eg, use #ff0000 for red. | <color=#ff0000>Red Text</color> | |
| size | Specify the font rendering size, the size should be a integer. | <size=30>enlarge me</size> | The size assignment should use = sign. |
| outline | Specify the font outline, you could customize the outline color and width by using the color and width attribute. | <outline color=red width=4>A label with outline</outline> | If you don't specify the color or width of outline, the default color value is #ffffff and the default width is 1. |
| b | Render text as bold font | <b>This text will be rendered as bold</b> | The tag name must be lowercase and cannot be written in bold. |
| i | Render text as italic font | <i>This text will be rendered as italic</i> | The tag name must be lowercase and cannot be written in italic. |
| u | Add a underline to the text | <u>This text will have a underline</u> | The tag name must be lowercase and cannot be written in underline. |
| on | Specify a event callback to a text node, when you click the node, the callback will be triggered. | <on click="handler"> click me! </on> | Except for on tag, color and size tags can also add click event parameter. eg. <size=10 click="handler2">click me</size> |
| param | When the click event is triggered, the value can be obtained in the second attribute of the callback function. | <on click="handler" param="test"> click me! </on> | Depends on the click event. |
| br | Insert a empty line | <br/> | <br></br> and <br> are both invalid tags. |
| img | Add image and emoji support to your RichText. The emoji name should be a valid sprite frame name in the ImageAtlas. | <img src='emoji1' click='handler' /> | Only <img src='foo' click='bar' /> is a valid img tag. If you specify a large emoji image, it will scale the sprite height to the line height of the RichText together with the sprite width. |
Optional attributes of img tag
For better typography, additional optional attributes to the img tag have been provided. Developers can use width, height to specify the size of the SpriteFrame. This will allow the image to be larger or smaller than the line height (but it will not change the line height).
When the height or width of the SpriteFrame changes, The align attribute may need to be used to adjust the alignment of the image in the line.
| Attribute | Description | Example | Note |
|---|---|---|---|
| height | Specify the SpriteFrame height size, the size should be a integer. | <img src='foo' height=50 /> | If you only assign height the SpriteFrame will auto keep aspect-ratio |
| width | Specify the SpriteFrame width size, the size should be a integer. | <img src='foo' width=50 /> | Use both Height and Width <img src='foo' width=20 height=30 /> |
| align | Specify the SpriteFrame alignment in line, the value should be bottom, top or center. | <img src='foo' align=center /> | Default SpriteFrame alignment will be bottom |
To support custom image layout, the offset attribute can be used to fine-tune the position of the specified SpriteFrame in the RichText component. When setting the offset attribute, keep in mind that the value must be an integer, and it will cause the image to overlap the text if it is not set properly.
offset attribute | Example | Description | Note |
|---|---|---|---|
| Y | <img src='foo' offset=5 /> | Specify the SpriteFrame to offset y + 5 | If offset only set one Integer value it's will be offset Y |
| Y | <img src='foo' offset=-5 /> | Specify the SpriteFrame to offset y - 5 | Use minus to decrease Y position |
| X, Y | <img src='foo' offset=6,-5 /> | Specify the SpriteFrame to offset x + 6 and y - 5 | The offset values should only contains 0-9, - and , characters |
Nested Tags
Tags could be nested, the rules is the same as normal HTML tags. For example, the following settings will render a label with font size 30 and color value green.
<size=30><color=green>I'm green</color></size>
is equal to:
<color=green><size=30>I'm green</size></color>
Cache Mode
Since the RichText component is assembled from multiple Label nodes, the number of drawcalls for complex rich text will also be high. Therefore, the engine provides the CacheMode setting of the Label component for the RichText component to avoid the increase of drawcall. For a detailed description of each cache type, please refer to the Cache Mode of the Label component documentation.
| Mode | Description |
|---|---|
| NONE | By default, for each Label node created by RichText, set its CacheMode to NONE, that is, generate a bitmap of the entire text of each Label and render it separately. |
| BITMAP | After selection, for each Label node created by RichText, set its CacheMode to BITMAP type, that is, generate a bitmap of the entire text of each Label, and add the bitmap to the dynamic atlas, and then according to the dynamic atlas to assemble and render. |
| CHAR | After selection, each Label node created by RichText has its CacheMode set to CHAR type, that is, the text of each Label is cached in a globally shared bitmap in "words". Each of the same font style and size is Characters will share a cache globally. |
Note: the RenderTexture module in the Project -> Project Settings -> Module Config panel cannot be removed when using the cache mode.
Detailed Explanation
The RichText component is implemented in the JavaScript layer and uses the Label node as the rendering part. All the layout logic goes also in JavaScript layer. This means if you create a very complex RichText, it will end up with many label node created under the hook. And all these label node are using system font for rendering.
Avoid modifying the RichText content frequently in the game's main loop, which can lead to lower performance. Also, try to use the normal Label component instead of the RichText component if possible, and BMFont is the most efficient.
Example
on
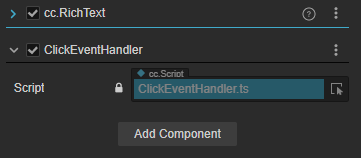
Let's take the on tag as an example. Please create a new RichText node, and a custom script component, and attach it to the rich text node.

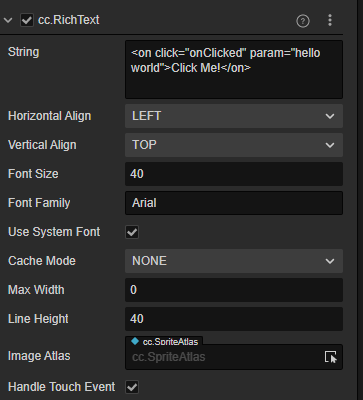
Copy the following text to the String property of the RichText Component.
<on click="onClicked" param="hello world">Click Me!</on>
Copy the following code to your custom script.
import { _decorator, Component, EventTouch } from 'cc';
const { ccclass, property } = _decorator;

@ccclass('ClickEventHandler')
export class ClickEventHandler extends Component {

    onClicked(eventTouch:EventTouch, param:string){
        console.log("onClicked", param);
    }
}
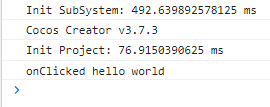
Then run the game.

Click the RichText on the screen, and you can see the following output in the console.

