Terrain System
The terrain system is an efficient tool for creating mountainous landscapes. Users can use various tools to sculpt out basins, mountains, valleys, plains and other landforms.
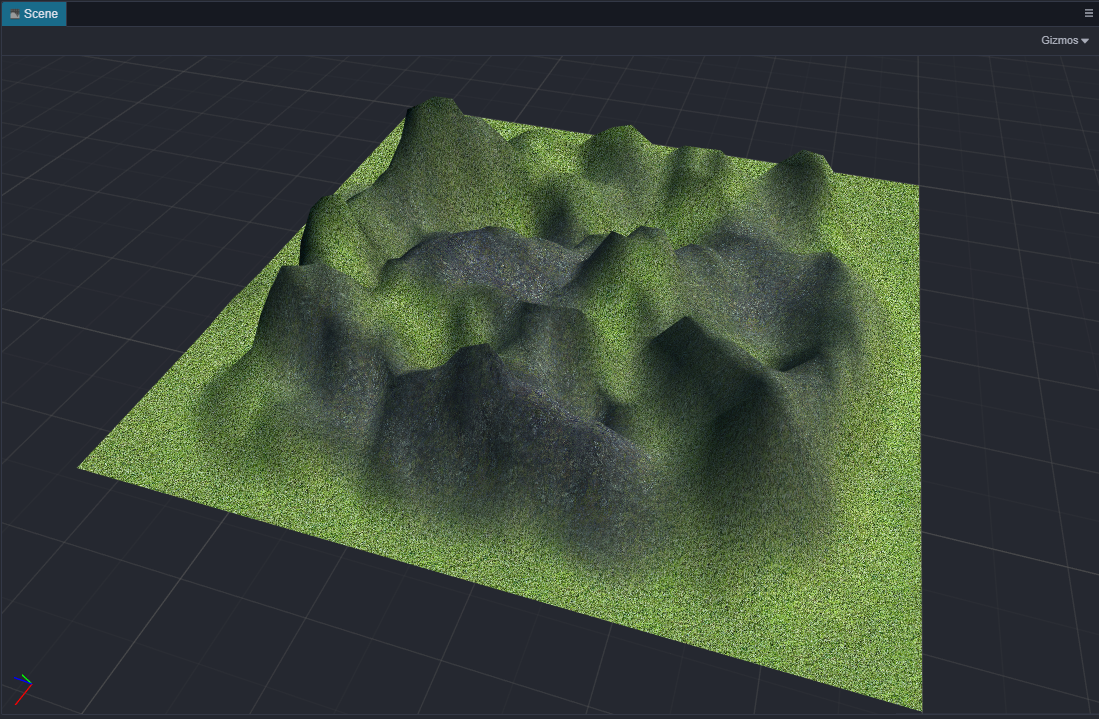
Creating Terrain Objects and Assets
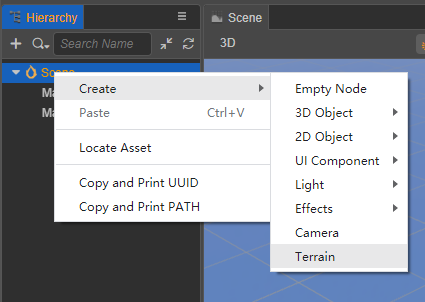
To create a new terrain in the project, users need to create a terrain object in the scene in conjunction with a terrain asset in the project directory:
Right click anywhere in the Hierarchy panel and select Create -> Terrain. This will create a new terrain object in the current scene. Terrain objects can be moved but is prohibited from rotating and scaling.
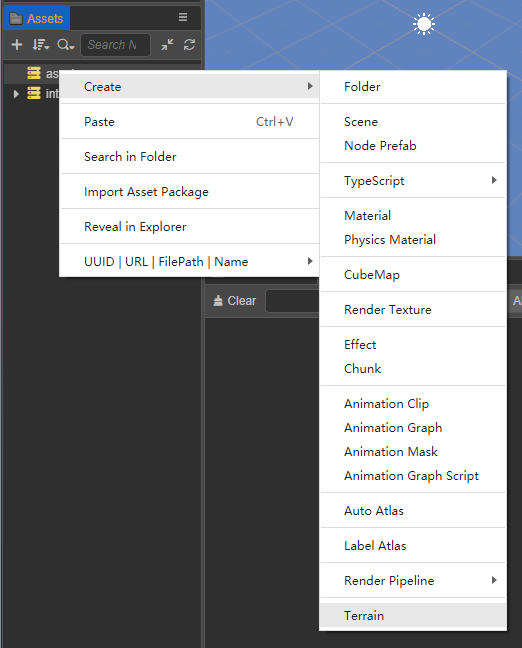
Right click anywhere in the Assets panel and select Create -> Terrain. This will create a new terrain asset in the project directory. Terrain objects require terrain assets in conjunction to work properly.
Configuring Terrain Properties
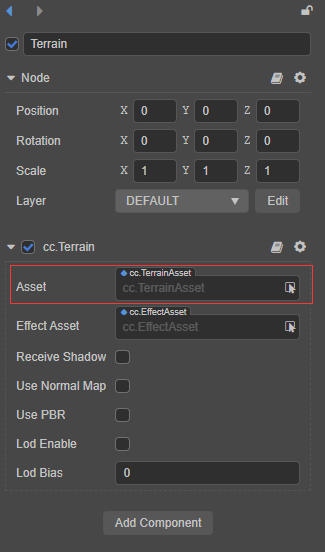
Select the terrain object in the Hierarchy panel. Drag and drop the terrain asset from the Assets panel in the Asset property of the terrain component (cc.Terrain) or click the arrow button behind the Asset property and select the terrain asset from the drop-down menu.
The terrain component includes properties as follows:
| Property | Description |
|---|---|
| Asset | Specify terrain asset |
| Effect Asset | Specify a shader to render terrain, e.g. builtin-standard.effect |
| Receive Shadow | Allow shadows to be casted on the terrain object |
| Use Normal Map | Allow terrain to be rendered with normal maps |
| Use PBR | Allow terrain to be rendered using PBR maps |
| Lod Enable | Enable LODs for the terrain mesh to improve rendering performance |
| Lod Bias | Specify the distance at which the LOD level is switched |
Terrain Editing Tools
With the terrain asset specified in the Asset property, users now have access to the terrain editing panel in lower right corner of the Scene panel, as well as terrain editing tools on the upper left corner of the Scene panel.
Terrain editing panel includes properties brush size and intensity, terrain material and layers, etc. which can be accessed via Manage, Sculpt, Paint and Select tabs.
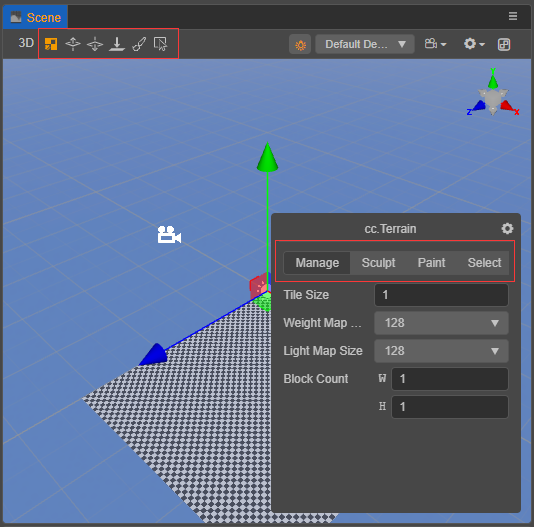
Terrain editing tools can be found at the upper left corner of the Scene panel:
- Manage tool: Switch to Manage tab in terrain editing panel.
- Paint Bulge tool: Switch to the bulge brush. This is equivalent to selecting Bulge in the
BrushModeproperty under Sculpt tab in the terrain editing panel. With the bulge brush, users may sculpt bumps in the terrain mesh. - Paint Sunken tool: Switch to the sunken brush. This is equivalent to selecting Sunken in the
BrushModeproperty under Sculpt tab in the terrain editing panel. With the bulge brush, users may sculpt recesses in the terrain mesh. - Paint Smooth tool: Switch to the smooth brush. This is equivalent to selecting Smooth in the
BrushModeproperty under Sculpt tab in the terrain editing panel. With the smooth brush, users may smooth out the excessive bumpiness of the terrain mesh by averaging the vertices heights. - Paint tool: Switch to the material painting brush. This is equivalent to selecting the Paint tab in the terrain editing panel. With the paint brush, users may no longer sculpt structures on the terrain mesh. Instead the brush allows users to paint a layer of texture on top of the existing texture layer of the terrain mesh.
- Select tool: Switch to the selection tool. This is equivalent to selecting the Select tab in the terrain editing panel. With the selection tool, users may gain more information including texture layers and height alphas by selecting a tile in the terrain object.
Working with Terrain: Manage
The Manage tab includes properties to adjust the overall size, density and texel density of the terrain object. A terrain object consists of multiple instances of an editable surface known as a tile block, which is 32 by 32 meters by default (with TileSize being equal to 1.) A terrain object requires at least one tile block.
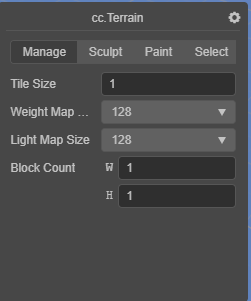
| Parameter | Description |
|---|---|
| Tile Size | Scalar for a single tile. By default, a tile block is 32 by 32 meters. This property scales the tile block linearly, which means the final size of a tile block is 32 * Tile Size square meters. |
| Weight Map Size | Resolution of the weight map which produces the bumps and recesses in the terrain mesh. Higher resolution yields more detailed structures in the terrain mesh. |
| Light Map Size | Resolution of the light map |
| Block Count | Number of tile blocks in the current terrain object |
Working with Terrain: Sculpt
Users may create the structure of the terrain object by sculpting bumps and recesses in the terrain mesh.
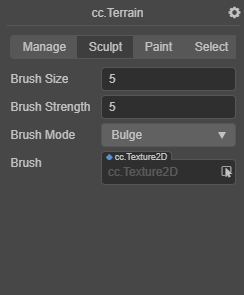
| Parameter | Description |
|---|---|
| Brush Size | Size of the active brush |
| Brush Strength | Intensity of the active brush |
| Brush Mode | Active mode of the brush, including Bulge, Sunken, Smooth, Flatten, Set Height |
| Brush Height | Height of the brush, only availabe with Set Height mode |
| Brush | Stencil of the brush, requires a texture map with alpha channel as stencil |
| Brush Rotation | The brush rotation |
| Brush mode | Description |
|---|---|
| Bulge | Sculpt bumps in the terrain mesh |
| Sunken | Sculpt recesses in the terrain mesh |
| Smooth | Smooth out terrain bumpiness by averaging vertices heights |
| Flatten | Flatten terrain by resetting vertices heights to the same value |
| Set Height | Used in conjunction with the Brush Height property to reset vertices heights to a certain value |
While a brush tool is activated, use LMB to sculpt or paint on the terrain mesh. Hold Shift to temporarily switch from Bulge mode to Sunken mode when Bulge brush is activated, or vice versa when Sunken brush is activated.
Working with Terrain: Paint
With the Paint tool, users may paint textures on the terrain mesh. Paint tool includes properties as follows:
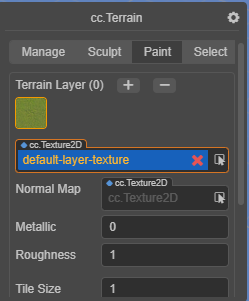
| Parameter | Description |
|---|---|
| Terrain Layer | Texture layers for the current terrain object, see below in section Layer editing. |
| Brush Size | Size of the active brush |
| Brush Strength | Intensity of the active brush |
| Brush Falloff | Hardness of the active brush 0.0 indicates full hardness. 1.0 indicates full feathering. |
| Brush | Stencil of the brush, requires a texture map with alpha channel as stencil |
Painting with Layers
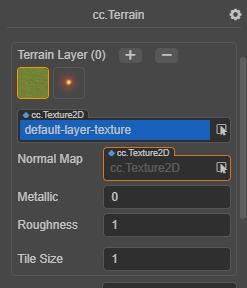
Users may paint multiple layers of texture on the terrain mesh. Click the + or - button at the top right of the terrain editing panel to add or delete layers (up to 4 layers are supported.) Once a Layer is selected, use the Paint tool to paint on the corresponding layer.
| Parameter | Description |
|---|---|
| Terrain Layer | Texture layers for the current terrain object |
| Normal Map | Assign a normal texture to the selected layer. For this property to take effect, the Use Normal Map property in the terrain component must be enabled. |
| Metallic | Set the metallic value of the selected layer |
| Roughness | Set the roughness value of the selected layer |
| Tile Size | Scalar for a single tile. This will only take effect regarding texture projection. Users may use a smaller tile scale compared to that in terms of the terrain construction (Tile Size under Manage tab) to achieve higher texel density. |
Working with Terrain: Select
When switching to the Select tab and selecting a terrain block in the Scene panel, information about the current terrain block will be displayed.
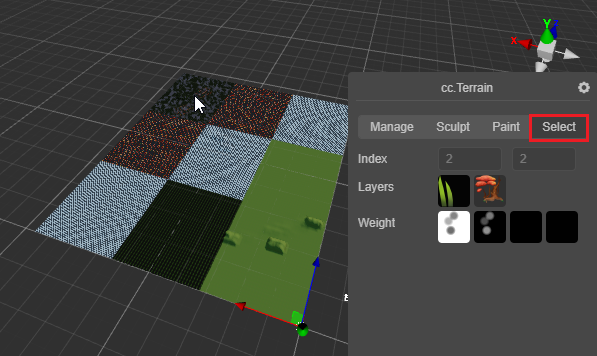
| Parameter | Description |
|---|---|
| Index | Index of the selected block (in x and y axis.) |
| Layers | Texture layers being applied to the selected block |
| Weight | Weight maps of the selected block |
