Publish to Web Platforms
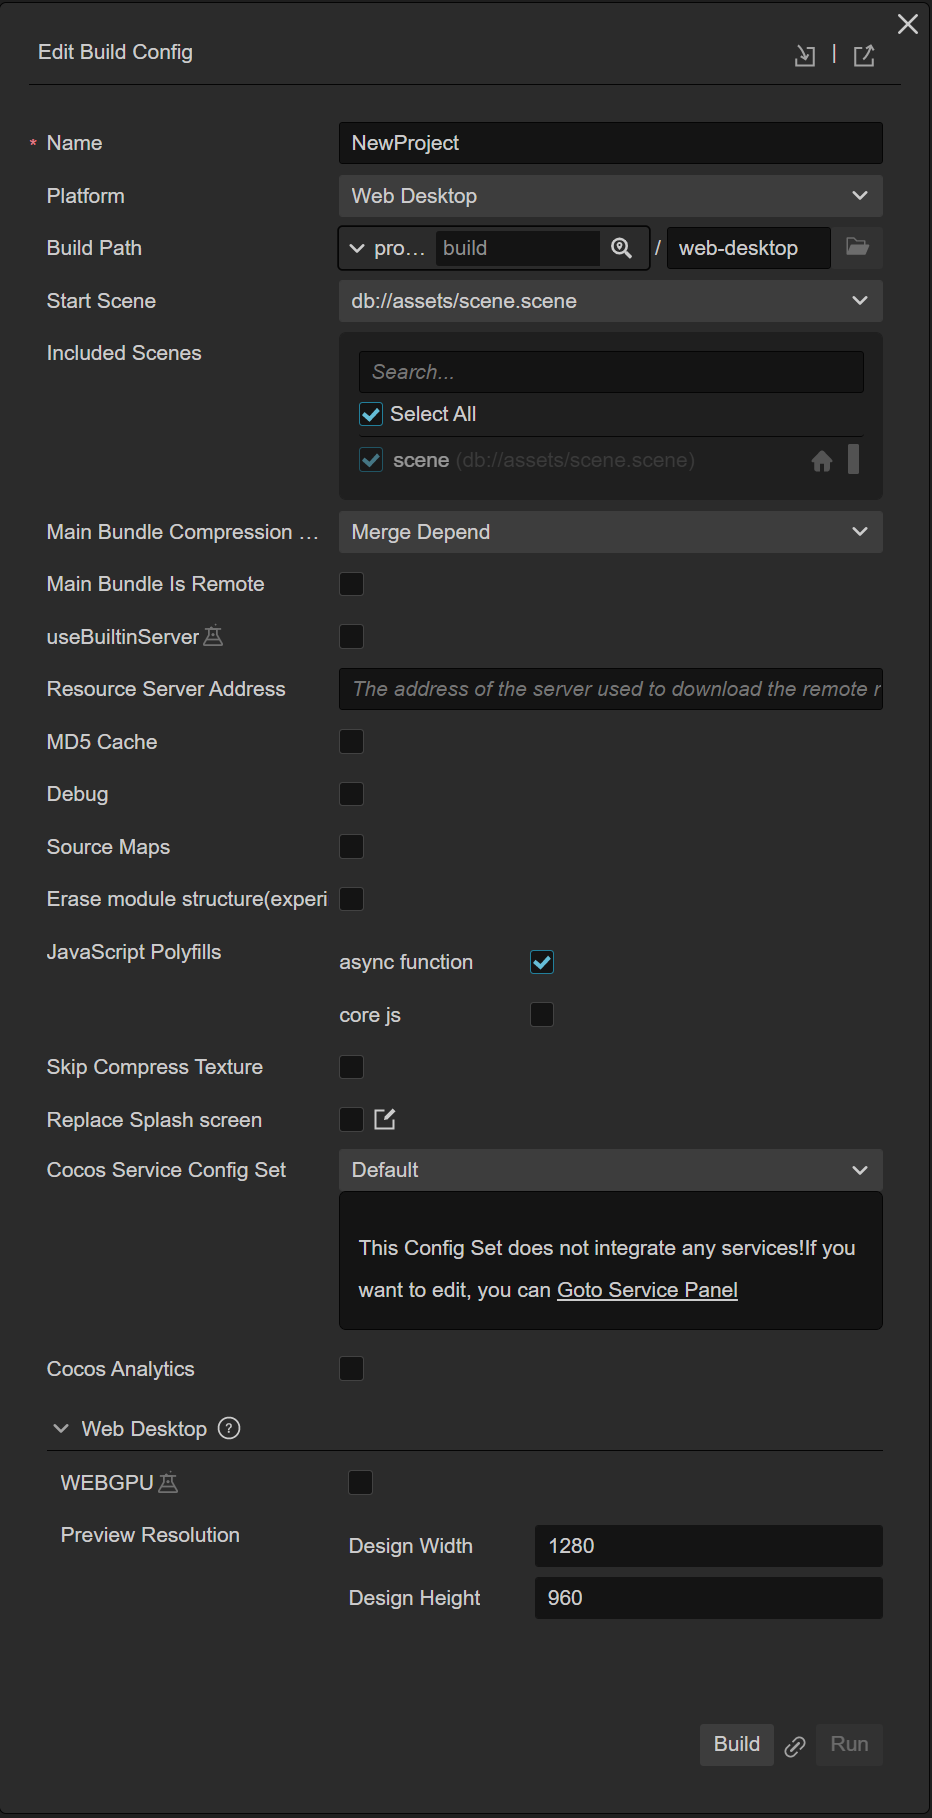
Select Project -> Build from the main menu, and open the Build panel.

Cocos Creator provides two web platform page templates. Select Web Mobile or Web Desktop through the drop-down menu of Platform. The main differences between them are:
- Web Mobile will fill the entire browser window with the game view by default.
- Web Desktop allows to specify the resolution of a game view when publishing, and the game view will not change with the browser window size afterwards.
Introduction to Build Options
For the general build options of each platform, please refer to the General Build Options Introduction documentation for details.
Web Desktop
| Build options | Description | Field name (for command line publishing) |
|---|---|---|
| Resource Server Address | The server address used to download remote resources. For details, please refer to the content of the Resource Server Address section below. | remoteServerAddress |
| WEBGPU | Whether use WebGPU as rendering backend | WEBGPU |
| Preview resolution | Game view resolution, the default is (1280, 960) | resolution |
| Polyfills | Build supports polyfills of some new features of scripts. Corresponding processing will be done when scripts are packaged. Developers can choose the polyfills to use according to actual needs. For the time being, only Async Functions are supported, and more functions will be opened in the future. | polyfills |
Web Mobile
| Build options | Description | Field name (for command line publishing) |
|---|---|---|
| Resource Server Address | The server address used to download remote resources. For details, please refer to the content of the Resource Server Address section below. | remoteServerAddress |
| Orientation | Optional values include Auto, Landscape, Portrait | orientation |
| Polyfills | Build supports polyfills of some new features of scripts. Corresponding processing will be done when scripts are packaged. Currently, there are async Functions and coreJs. Developers can choose the polyfills to use according to actual needs. | polyfills |
| vConsole | Insert the vConsole debugging plug-in. vConsole is similar to the mini version of DevTools for assisting debugging. | embedWebDebugger |
| Preview the QR code | Used to scan and preview, see the introduction below for details | - |
| Preview URL | Link for preview, see the introduction below for details | - |
Resource server address
This option is optional and used to fill in the address where the resource is stored on the server.
- If do not fill in, the
remotefolder in the release package directory will be packaged into the built game package. - If fill in, it will not be packaged into the game package. Developers need to manually upload the
remotefolder in the release package directory to the resource server address filled in after the build. For details, please refer to Upload resources to a remote server.
- If do not fill in, the
Preview URL
The build supports simultaneous previewing of multiple Web projects, so the preview URL to be built is no longer uniform, but each build task will have a separate preview URL, which does not interfere with each other. Click the URL to automatically open the browser for preview. The specific preview URL splicing rule is ${Preview IP address in Preferences panel}😒{Editor preview port number}/${Build platform}/${Build task name}/index.html.

Build and Preview
After configuring the build options, click the Build button to start the web platform version build. A progress bar will appear on the panel. When the progress bar shows Build success, the build is complete.
Next, click the Run button to open the built game version in the browser for preview and debugging.

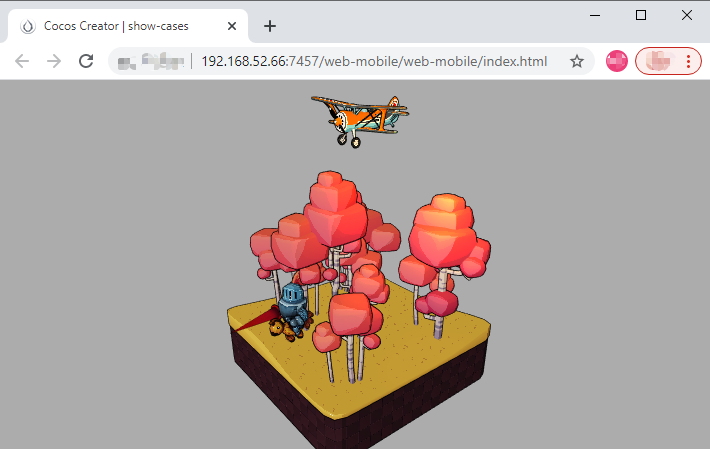
The picture above is the preview of the Web Mobile platform. Notice that the game view occupies the entire browser window, while the game view of Web Desktop has a fixed resolution and will not fill the screen.
WebGPU Support (Experimental)
WebGPU is the next generation GPU API for the web. Cocos Creator supports WebGPU as rendering backend for building Web-Desktop since 3.6.2, just enable WebGPU option in the build panel when building Web-Desktop. The build process will be a little bit different with WebGPU option enabled. Normal builtin server won't work for WebGPU package. When building done, you need to locate the package folder by clicking the folder icon in the build panel. Then you can either start an http-server or nginx server to make an accessible address for the supported browsers. As WebGPU standard is still a working draft, it's not widely supported on all browsers yet. So please remember to check the compatibility of WebGPU on your browser, see chapter Browser Compatibility below for details.
Browser Compatibility
The desktop browsers tested during the development of Cocos Creator include: Chrome, Firefox and QQ Browser. Other browsers can be used normally as long as the kernel version is high enough. For the browser, please do not enable IE compatibility mode.
Browsers tested on mobile devices include: Safari (iOS), Chrome (Android), QQ Browser (Android) and UC Browser (Android).
When you build Web-Desktop platform with WEBGPU option enabled, only certain versions of chromium is supported currently. Chromium history version is available here, version 105 and 106 should be well supported by Cocos Creator's WebGPU build, support for later version is comming soon. After chromium is opened, visit chrome://flags in the address bar, then enable WebGPU Developer Features and reopen chromium, then everything is set for you to try your project rendered with WebGPU.
Retina Settings
Set whether to use high resolution through view.enableRetina(true) in the script. Retina display will be turned on by default when it is built on the Web platform. For details, please refer to the enableRetina API.
Publish to Web Server
To publish or share the game on the Internet, just click the folder icon button at the bottom left of the Build Task, and after opening the release path, follow the name of the current build task to build the corresponding folder in the the entire content is copied to the Web server and can be accessed through the corresponding address.

Regarding the establishment of the Web server, search for related solutions such as Apache, Nginx, IIS, Express, etc.
