Cocos Shader Creation and Usage
Creating a Shader
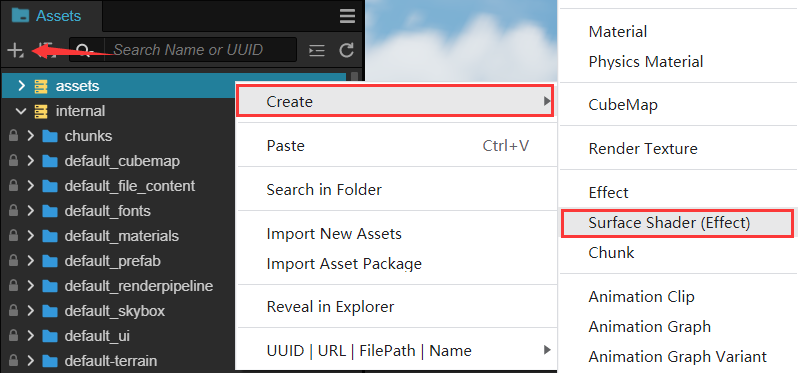
To create a shader, click on the + button in the top-left corner of the Asset window (or right-click in the Assets folder), and select Effect or Surface Shader from the pop-up menu. This will create a new shader file.

There are two types of shaders available.
- Effect: A simple shader without lighting. You can refer to internal/effects/builtin-unlit.effect for an example.
- Surface Shader: A PBR-based shader. You can refer to internal/effects/builtin-standard.effect for an example.
Let's take the Surface Shader as an example. The engine will create a shader file named surface-effect in the Assets Window.

In the Inspector panel, you can see that the shader consists of the following main parts.
| Property | Description |
|---|---|
| Shaders | The names of the current shader and its rendering processes. |
| Precompile Combinations | Whether to enable precompiled macro definition combinations. See the explanation below for more details. |
| GLSL 300 ES/100 Output | Shader output. See the explanation below for more details. |
Shaders
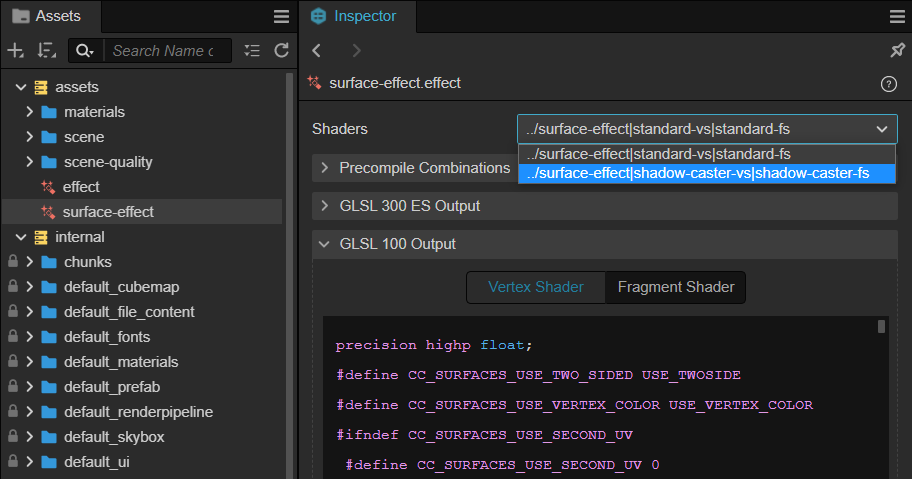
If the current shader has multiple render passes, you can select different render pass through the dropdown menu on the right side of Shaders. After selecting a render pass, you can view the compiled shader code in the GLSL Output window.

Precompile Combinations
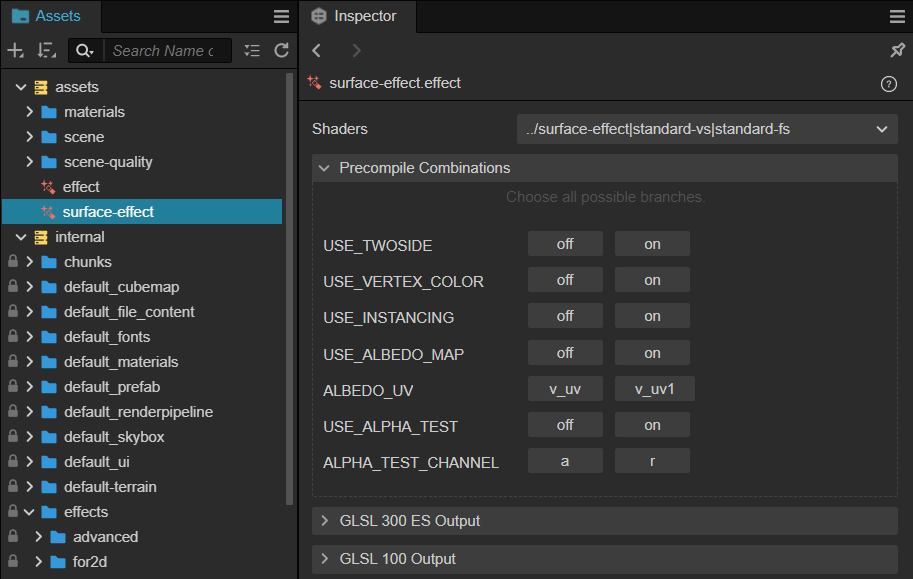
Normally, shaders are compiled when the corresponding macro definitions are used. However, if there are many macro definitions involved, it may cause stuttering. In such cases, you can use this option to precompile combinations of macro definitions. For example, in the following configuration.

GLSL Output
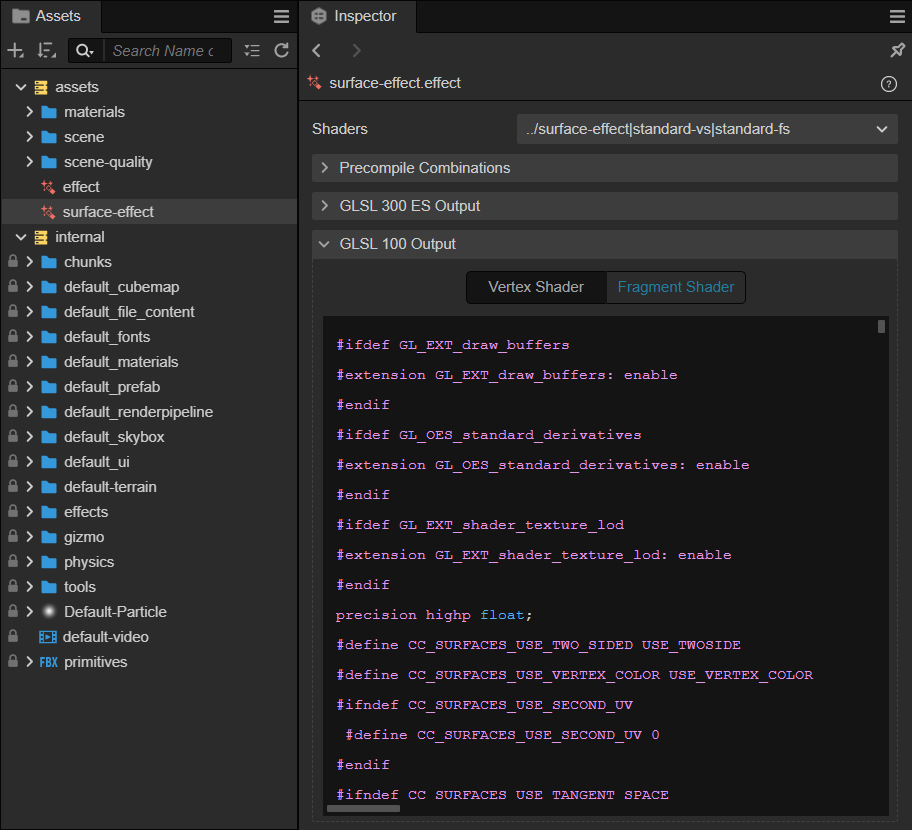
The engine currently provides GLSL 300 ES and GLSL 100 output options.
By selecting different tabs, you can switch between displaying the compiled vertex shader and fragment shader.

Access Built-in Shaders in Code
The internal/effects/ folder contains built-in shaders provided by the engine, which are automatically loaded after game starts.
Taking the builtin-standard as an example, you can access and use it in code as follows.
// Get the built-in Standard shader ‘builtin-standard.effect’
const effect = EffectAsset.get('builtin-standard');

const mat = new Material();

// Initialize the material using the built-in PBR sahder ‘builtin-standard.effect’
mat.initialize({ effectName: "builtin-standard" });
Dynamic Loading Shaders
Shader files located in the resources folder can be loaded and used using the "resources.load" method.
Here's an example of how to do it in code.
resources.load("custom-effect", EffectAsset, (err:Error, data:EffectAsset)=>{
    //get effect
    const effectAsset = EffectAsset.get("../resources/custom-effect");

    //use the loaded effect
    const material = new Material();
    material.initialize({ effectName: "../resources/custom-effect" });
})
Note: After successfully loading a custom shader, the effectName should be "../" + the file path.
